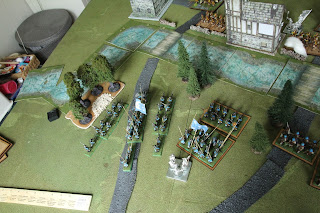
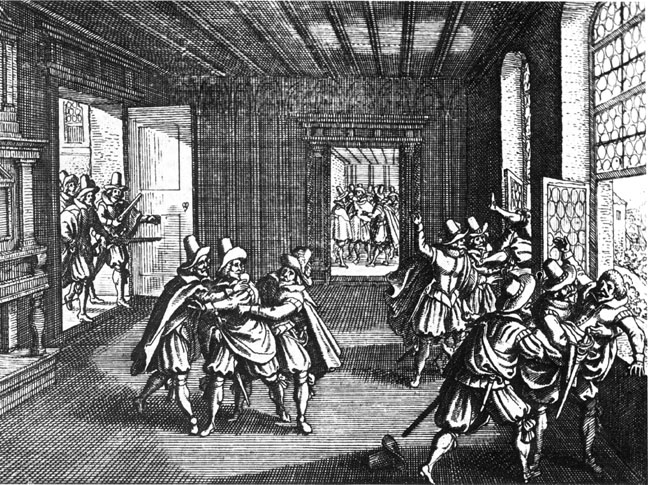
We decided that Bucquoy's forces would have traveled though the village of Habry where the first of our skirmishes was decided to take place. The idea was that there would be a vanguard of mercenary imperials moving in advance of the main force to secure the two bridges in the village in order to provide safe passage for the main force. As luck would have it, a small detachment of mercenary bohemians had already taken up defensive positions.
Looking from Google Maps' images we tried to represent Habry in 1618 on the table. The rebels would already be positioned in the village and the imperials would invade from the south. In order to compensate for the size of the 6' by 4' table, we used 2/3 ranges for the game (a decision that worked well in a pre-campaign game).
The imperial army advances from the south in marching column
I took the imperial side whilst my opponent took the valiant defenders of Bohemia. The forces were randomised as per The Devil's Playground supplement:
Bohemians, lead by mercenary captain Michail Hromádka (Ld 7):
- 1 unit of dragoons
- 1 unit of cavalry
- 2 units of pike
- 4 units of musket
The imperials were comprised of 2 forces - one was my "own" force and the other was dispatched to assist in the capture of Habry. The forces were randomised and then split into infantry and cavalry battallia.
Imperial infantry battallia, lead by mercenary captain Vacláv Schovánek (Ld 7):
- 3 pike units
- 5 musket units
Imperial cavalry battallia, lead by mercenary captain Vladimír Pacal (Ld 7):
- 2 units of cuirassiers
- 1 unit of cavalry
The positions of the defenders
The imperials entered on the first turn from the end of the table in march column. Schovánek's infantry changed into block formations whereas Pacal's cavalry proceeded to the river to find a suitable crossing (1 move to search, success on 4+, the crossing counts as difficult ground and can only be crossed in marching column).
The leftmost cuirassier unit (proxied by my blue cavalry) manages
to find a shallower spot suitable for crossing. Unfortunately musketeers
are already awaiting on the other shore.
Schovánek's 2nd infantry regiment advances within
firing range and a shootout erupts against the the bohemians
Meanwhile, Pacal's first unit of cuirassiers manage to cross the river, but are quickly reduced to a shaken state by the combined efforts of Hromádka's Dragoon's shotte and a charge by Hromádka's cavalry. This doesn't deter Pacal from still trying to secure a foothold on the other side of the river.
I mean... they're only dragoons right? What possible harm
could they do?
Things seemed to work in imperial's favour in the beginning. Schovánek's 3nd infantry regiment (for some reason they were scots highlanders) also moved into position to force the defenders of the bridge to retire.
Your haggis or your life!
Then the midden hit the windmill, when Pacal's cavalry suffered a setback on the eastern side of the battlefield. The bohemians proved too much for them, the battallia's morale was broken and the shaken troops made a quick retreat away from the nasty bohemians.
Run away! Live today to be paid another day!
Schovánek was also struggling with his 1st infantry. They decided that they weren't promised enough gold for their services regarding the risks of taking a defended bridge and for several turns decided not to move before Schovánek promised them a substantial raise. In protest they even started marching away from the battlefield (a blunder: move left) before Schovánek was forced to accept their terms.
The first infantry regiment of Schovánek apparently followed the old
landsknecht creed of: "Kein Geld, keine Landsknechte"
To make up for lost time in the negotiations, Schovánek commanded
the 1st regiment to quickly march into position.
Finally Schovánek could breathe. His troops were now in
position to begin securing the bridges.
Schovánek then decided that if he was to achieve anything with this ragtag mercenary force of his, he would have to lead his forces directly. He lead first the 3rd infantry regiment (with its second musketeer wing first shot to a shaken state and unsuccessfully rallied and forced to retreat) across the bridge where they were met by the fire of the bohemians' muskets.
Bah! You silly czech couldn't hit a barn door!
The 2nd infantry regiment follows close behind
On the western flank Schovánek takes a pouch of gold, runs along the
bridge and the 1st regiment quickly follows in marching column.
The eastern bridge secured, there are problems with the 1st regiment, who are promised a huge bonus, if they manage to oust the defending pikemen on the other side. With the gleam of gold in their eyes, the 1st regiment charges along the bridge, but eventually are no match for the bohemians. The bonus lost and casualties already taken, the pikemen decide to leg it.
The 2nd and 3rd infantry fare better on the eastern bridge and finally cause enough casualties on the bohemians that their battallia morale is broken (it was a close call, one more shaken unit for the empire and the bohemians would have won the day). The bohemians retire and Schovánek manages to secure a route for Bucquoy's army.
Conclusion: A minor victory for the empire.
Lessons learned:
- Isolated cavalry forced into a bottleneck is soon lost. Although cuirassiers have a strong morale save, a good ambush is all it takes to render them ineffective.
- Troops are fiendishly difficult to manage with leadership of just 7. Having been used to Ld of 8-9 in Black Powder, the stubbornness of troops towards a leader they won't trust is wonderful to watch.
- The command range takes a whole different meaning. Even the basic one battallion mercenary company is difficult to command with a single captain. The imperials suffered the effects with Schovánek forced to juggle between both eastern and western bridges to ensure his troops' advance. The bohemians also had trouble keeping their forces going with repeated failed command rolls.
It was a wonderful game with tension and frustration continuing throughout the game. It could have ended both ways. The emphasis was in commanding the troops and both successes and failures of command were more marked than success of individual troops - although marked heroic units were Hromádka's dragoons on the bohemian side who were instrumental in forcing Pacal's cavalry to retreat and Schovánek's 3rd regiment (the "not-scots") who secured the eastern bridge. After the game, the dragoons got a "Marauders" upgrade and the 3rd regiment pikemen got "Brave" upgrade.


